This is a pretty simple tag tutorial and should be easy to follow.
However, you’ll need some experience using Paint Shop Pro.
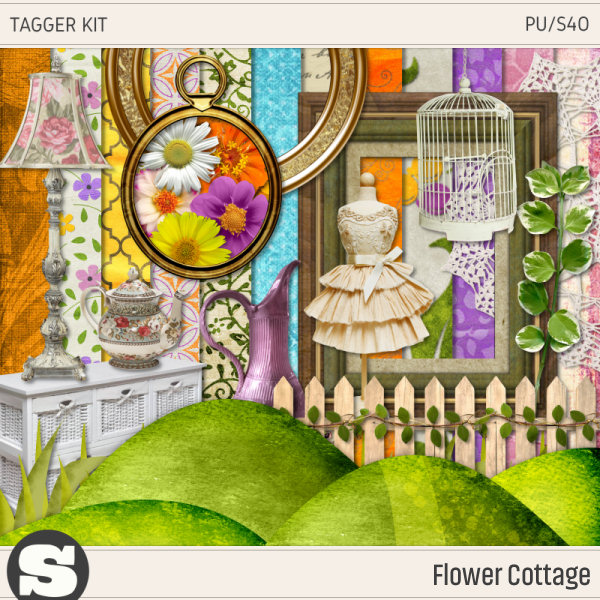
Here’s the tag we’ll be making:

For this tag challenge you’ll need to download the parts of my Spring Blush kit HERE.
We’ll be using the following elements from this kit:
stk_spring-blush_ep11.png (flower)
stk_spring-blush_ep33.png (frame)
stk_spring-blush_ep23.png (foliage)
stk_spring-blush_ep36.png (foliage)
stk_spring-blush_ep37.png (pink denim pocket)
You’ll also need a photo (resized to fit inside frame).
The font I used can be downloaded from HERE.
Optional:
I also added 2 pieces of Baby’s Breath foliage.
Adding the Baby’s Breath was a last minute decision but you don’t need it for this tutorial.
However, if you find some you might want to use it.
(FYI – I’ve looked for the Baby’s Breath on my computer but I can’t find it.)
Now let’s get started:
Open Paint Shop Pro.
Create a new layer that measures 800 x 800 pixels.
Open your frame (stk_spring-blush_ep33.png).
Copy and close frame.
Paste as new image.
Resize frame to 500 pixels in width and 269 pixels in height.
Select all and copy.
Close frame.
Paste into layer.
Rotate image left 90 degrees.
Select all and float.
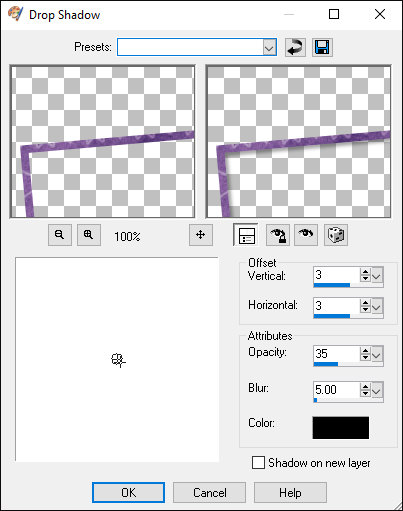
Effects, 3d effects, and add a drop shadow; color #000000 (screen shot below).

Select none.
Create a new layer and move to bottom.
Open photo.
Copy and save as new image.
Resize photo to around 510 pixels in width.
Select all and copy.
Close image.
Paste into layer.
Move photo around until it lines up under the frame perfectly.
Create a new layer and move to top.
Open the pink denim pocket (tk_spring-blush_ep37.png).
Resize pocket to 50% in size.
Copy and close.
Paste pocket onto top layer.
Move pocket around so it sits nicely onto the right side of the frame.
Effects, 3d effects, and add a drop shadow; color #000000 (same as above screen shot).
Select none.
Create a new layer and move it below the pocket.
Open foliage element from the tagger kit and resize to 50
percent before adding to the layer.
Select all and copy.
Paste into layer.
Move foliage pieces around until you get them how you want them.
Effects, 3d effects, and add a drop shadow; color #000000 (same as above screen shot).
Select none.
Repeat this process for each piece of foliage.
Create a new layer and move it to top.
Open your flower and resize (35 percent for larger flower).
Select all and copy.
Paste into layer.
Move around flower until you have it where you want it.
Effects, 3d effects, and add a drop shadow; color #000000 (same as above screen shot).
Select none.
Open the same flower and resize (30 percent for smaller flower).
Select all and copy.
Paste into layer.
Move around flower until you have it where you want it.
Effects, 3d effects, and add a drop shadow; color #000000 (same as above screen shot).
Select none.
After you’ve got the tag the way you want it, MERGE down all layers.
Using your Magic Wand, click anywhere on the blank space outside of the frame (screen shot below):

Image, crop to selection.
From here, you can add any text you want to your tag.
Save your tag.
You’re done!