
This is a pretty simple tag tutorial and should be easy to follow.
However; you’ll need some experience using Paint Shop Pro.
Here’s the sort of tag we’ll be making:

For this tag challenge you’ll need the following:
1. a flower photo
2. a rectangle shaped mask
3. a background image that matches your flower (you’ll need this to create your frame)
Now let’s get started:
Open PaintShop Pro.
Create a new layer that measures 800 x 800 in pixels.
Open your flower photo.
Resize to 600 (width) in pixels.
Copy and close photo.
Paste as new layer.
Layers, Load/Save Mask, Load Mask From Disk (screen shot below)

Click the Load button after you’ve found your mask to use.
Layers, Merge, Merge Visible.
Disable this layer.
Move the bottom layer to top.
How to make the frame:
Open background image and resize to 500 pixels in width.
Image, Canvas Size and resize to 500 width x 325 height in pixels.
Copy and close background image.
Paste into top layer.
Selections, Select All and Invert Selection.
Selections, Modify and Contract by 8 pixels.
Hit Delete.
Duplicate layer twice which will give you 3 layers.
Go to the very bottom frame layer.
Image, Rotate, Free Rotate (Direction) LEFT and (Degrees) 5.00 (screen shot below).
Selections, Select All, Float.

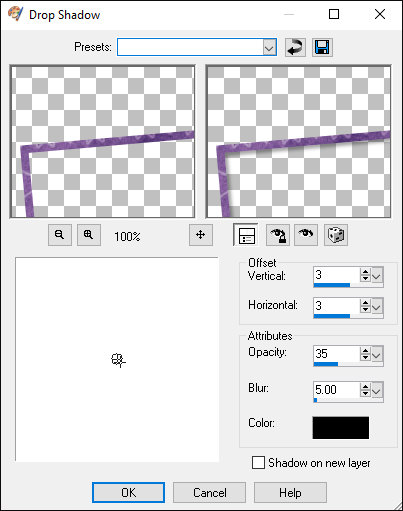
Effects, 3d effects, and add a drop shadow; color #000000 (screen shot below).
Move Up 1 layer to the next frame.
Image, Rotate, Free Rotate (Direction) RIGHT and (Degrees) 5.00.
Selections, Select All, Float.
Effects, 3d effects, and add a drop shadow; color #000000 (screen shot above).
Move Up 1 layer to top frame.
Selections, Select All, Float.
Effects, 3d effects, and add a drop shadow; color #000000 (screen shot above).
Layers, Merge, Merge Visible.
You should now have only 2 layers with the bottom layer still disabled.
Un-disable the bottom layer so all layers are showing.
Got to top layer and move the frame around so it fits nicely above your flower photo.
When you’ve got everything the way you like,
Layers, Merge, Merge Visible.
Using your Magic Wand, click anywhere on the blank space outside of the frame (screen shot below):

Image, invert selection, crop to selection.
Save your tag as a transparent png so you can open it later to add some text to it.
You’re done!
